


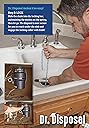

Garbage Disposal Installation Tool Steel
Product ID: 106855869
⏱️Turns 2-person job into 1-person task
⚙️Universal fit for top brands
🛠️Simple threaded shaft & locking wing nut
🛠️ Upgrade your kitchen game—install like a pro, solo and stress-free!
The Dr. Disposal Garbage Disposal Installation Tool Steel transforms a traditionally two-person, strenuous task into a quick, one-person job. Featuring a simple yet effective threaded shaft and locking wing nut, it securely holds the disposal in place, allowing for easy mounting even in tight spaces. Compatible with major brands like Incinerator, KUPPET, Whirlaway, and Waste-King, this compact, durable tool reduces strain and installation time, making it a must-have for any kitchen upgrade.
| ASIN | B07GZ9DCFZ |
| Best Sellers Rank | #959,388 in Tools & Home Improvement ( See Top 100 in Tools & Home Improvement ) #734 in Garbage Disposal Parts |
| Brand Name | Dr. Disposal |
| Color | Chrome |
| Customer Reviews | 4.7 4.7 out of 5 stars (725) |
| Date First Available | August 30, 2018 |
| Included Components | Dr. Disposal Garbage Disposal Installation Tool Steel |
| Item Dimensions LxWxH | 0.05 x 3 x 11 inches |
| Item Package Dimensions L x W x H | 9.96 x 3.46 x 1.02 inches |
| Item Weight | 17.01 g |
| Manufacturer | Dr. Disposal |
| Material | Plastic |
| Model Name | Dr. Disposal Garbage Disposal Installation Tool Steel |
| Number of Items | 1 |
| Package Weight | 0.22 kg |
| Part Number | DD18 |
| Size | One Size |
| Suggested Users | unisex-adult |
| Warranty Description | Warranty |
J**M
Great Tool!
This makes a potentially awkward job super easy. Another poster thought the inventor deserves a medal and I second that. I bought a fairly heavy 1 hp disposal and with this tool I installed it very quickly. I also used it to easily remove the old disposal. I would rate this the best $ I ever spent for a job specific tool and the price made the buying decision a no-brainer. Buy one....you won't be disappointed.
A**A
Amazing tool that works as advertised!
After preparing a new disposal for installation yesterday, I found out that I don't have the upper body strength to hold it safely, while lining it up and twisting it onto the under sink mounting ring. For reference it is a sort of mid size disposal and I'm a sort of mid size (not terribly athletic) woman. I didn't want to bother friends (especially with the pandemic going on) so googled and came across this amazing tool that arrived today. The instructions are very clear and it worked very smoothly. The disposal was supported by the chain, enabling me to use both hands to engage it onto the mounting ring. The bar that slots into the chain and goes across the sink opening is well designed with padding so it doesn't scrape the sink. I now have a functioning disposal again. Hooray!
C**G
This made installing the disposal very easy
I tried a year or more to change our disposal. I got it done, but it was far from easy. These things (especially the higher HP models) are heavy. I could not hold it up to the ring under the sink with one hand and spin the retainer on. I just don't have that much strength. So I resorted to using a hydraulic jack. I had one of these in my garage that I have used to jack up my car so I can change tires. The problem with using the jack is there is no good way to use it without the disposal falling off. I got it done, but it was hard and took way too much time. So now we get a new sink and I have to take out the disposal I installed last year and re-install it after the sink is in place. I found this tool and what a difference it made! I put the "arc" shaped metal part in the throat of the disposal and pulled up until the chain was tight. Then holding the chain with one hand I slipped the flat bar around the chain as close to the drain as I could get it. All was secure. So then I go under the sink and spin the ring to release the disposal. It drops less than a half of an inch and stays in place. Perfect. Then I go back up on top of the sink, pull up on the chain until the tension is off the flat bar and slip it off the chain. Then I lower the disposal down until it rests on the bottom of the cabinet. Putting it back on is the same process. Insert the arc into the throat of the disposal and keep a little tension on the chain until it is fed through the opening and on top of the sink. Then pull up on the chain, engage the flat bar, and the disposal is now in place and ready to rotate the retaining ring to hold the disposal in place. This is so much easier. I did the whole thing by myself without help from anyone. If you need to change out a disposal, this is THE TOOL to buy. It is cheap and makes the job so much easier.
S**N
Genius
As a licensed Plumber only 4 stars because I should have thought of this myself! This can easily be made by anyone with mechanical ability but for the price I do have other things to do.Also fits easily in tool backpack whereas those other long bulky ones do not.
R**Z
Tool accessorie
Great tool for replacing garbage disposals
_**_
Works exactly as it should
I have never replaced a garbage disposal before, but I was able to with this device. I am a woman with very little upper body strength. I knew holding the disposal in place with one arm while trying to twist the mounting ring with the other arm wasn't going to be possible for me. The Dr Disposal worked to hold the old disposal in place while I knocked it loose and it held the new disposal in place easily while I finished mounting it properly. It was well worth the money as I didn't have to hire a plumber and could do this replacement by myself. I've just left it under my kitchen sink for 10 years down the line when the disposal needs to be replaced again.
H**Y
Must-have for installing/replacing a garbage disposal!
Dr. Disposal makes removing and installing a garbage disposal very easy and safe. For the price, it's really an essential tool for removing or installing a disposal. To remove a disposal, after turning off the power, put the hook into the mouth of the disposal, set the bar across the mouth, pull up the chain to put tension on the supporting spring, and set the chain in the notch in the bar so that the disposal stays in place after it's disconnected. Under the sink, disconnect the disposal, then from above, tightly hold the chain (work gloves make it more comfortable to hold), then slip the chain out of the notch and gently lower the disposal to the floor. Pull the disposal clear of the sink, then remove the hook. Installing a new disposal is just as easy. Center the new disposal under the sink drain, put the bar over the drain, then ease the hook down with enough slack in the chain to be able to put the hook into the disposal. Set the chain in the notch in the bar so that it doesn't slip through, then put the hook into disposal. From above, release the chain from the notch and gently pull the disposal up. You should leave a little slack in the chain so that the top of the disposal is about 1/4" or so below the sink mounting hardware to give you room to maneuver the disposal into place. If you need to, you can snug the disposal up tightly against the sink hardware. Set the chain into the slot in the bar, then secure the disposal to the sink hardware. Pull the chain out of the notch, move the bar out of the way, remove the hook and you're ready to apply power.
G**Y
I'll NEVER install another Disposer without this tool!
Over the years, I've had occasion to install or replace several garbage disposers, and I didn't know a tool like this even existed. Now that I've installed a disposer while using it, I'll NEVER install another one without it. The sink cabinets I've had to work in seemed to always be small and cramped, forcing me to try to lift the disposer into place while outside the cabinet, with my arms fully outstretched. I'm not the strongest person in the world, and trying to hold the disposer with one hand while turning it's locking ring in place was near impossible. Enter Dr Disposal. To remove the old disposer, you simply hook the large piece of the tool into the grinder chamber through the drain, and secure it to the drain with the included chain and handle. Then, unhook the hoses and lock ring and use the chain to lower the disposer to the cabinet floor. Installing the new disposer is basically the reverse - set the new disposer on the cabinet floor, hook the large piece of the tool in the grinding chamber, run the chain up through the drain and pull the new disposer into place. Then secure the chain to the handle and lock it in place with the disposers' locking ring. Hook up the hoses and you're done! Pulling the new disposer into place with the chain is DRASTICALLY easier than the way I used to do it, and much safer. I was always worried about dropping it on some part of my anatomy I'd rather not lose. One bit of advice - when lifting or lowering the chain, were a leather work glove - the chain can feel pretty sharp on the hands. I paid full price for this tool, and no one has paid me anything to write this review. I'm simply very impressed with how useful it turned out to be and I'd buy it again in a heartbeat.
Trustpilot
1 day ago
2 months ago