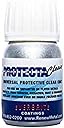


Desertcart purchases this item on your behalf and handles shipping, customs, and support to Austria.
🛡️ Keep your metals flawless and your style untouchable.
ProtectaClear is a premium clear protective coating designed to shield high-use metal surfaces from tarnish, oxidation, and fingerprints. Its easy-to-apply, self-leveling formula dries to a hard, invisible gloss that preserves the original metal finish while making jewelry hypoallergenic. One ounce covers approximately 4 square feet, providing long-lasting protection ideal for jewelry, stainless steel, silver, and other polished metals.


| ASIN | B01DCU12PG |
| Best Sellers Rank | #18,351 in Health & Household ( See Top 100 in Health & Household ) #25 in Household Cleaning Metal Polishes |
| Brand | ProtectaClear |
| Brand Name | ProtectaClear |
| Compatible Material | Metal |
| Coverage | 4 sq ft/oz |
| Customer Reviews | 4.5 out of 5 stars 2,899 Reviews |
| Finish Type | Gloss |
| Finish Types | Gloss |
| Item Form | Liquid |
| Item Weight | 1.76 ounces |
| Liquid Volume | 1 fluid ounces |
| Manufacturer | Everbrite, Inc. |
| Manufacturer Part Number | 43216-83271 |
| Material | Clear coating |
| Material Type | Clear coating |
| Model Number | 8542146770 |
| Number of Items | 1 |
| Number of Packs | 1 |
| Recommended Uses For Product | Coating for protection of small projects for high use metal, jewelry, stainless steel & more. Makes jewelry hypoallergenic. Recommended Uses For Product Coating for protection of small projects for high use metal, jewelry, stainless steel & more. Makes jewelry hypoallergenic. See more |
| UPC | 707152618922 |
| Unit Count | 1 Ounce |
K**A
Great for jewelry, stops tarnish and keeps everything shiny!
I bought ProtectaClear to seal some of my jewelry pieces that were starting to tarnish quickly, and I’m really impressed with how well it works. The finished coating is smooth, clear, and doesn’t change the color of the metal. My gold plated and silver pieces look brand new again and stay that way much longer. It does have a strong smell while applying, but once it dries and cures, the jewelry looks great and feels completely smooth. A little goes a long way, so the bottle will last a long time. How to use it: Clean the jewelry first and make sure it’s completely dry. Shake the bottle and apply a thin, even coat using the small applicator sponge or brush. Let it dry without touching it for about an hour, and then allow it to fully cure (I let mine sit overnight). That’s it — once cured, the coating is hard, clear, and helps protect against tarnish, fingerprints, and skin oils. Overall, this is a great product if you make jewelry or want to protect your favorite pieces from tarnishing or turning your skin green. I’m very happy with the results!
S**T
Great For Oura Ring Gen 3 Horizon Rose Gold!!
Oura customer service provides little to no advice on how to protect your ring and the reps know very little of the build material which is important when figuring out enamels and/or protective clear coats. To preface I have the Oura Ring Gen 3 Horizon Rose Gold, and I wear it on my left hand index finger (non-dominant hand) I took a chance on ProtectaClear and very happy I did! I did 4 applications/layers (Did not apply/dip whole ring) by brushing on the outer layer. I wore latex gloves and put the ring on my index finger and did circular motions with a small sponge applicator on the face and edges of the ring, but avoiding the inside so it doesn't effect the sensors. I have wore the Oura Ring for a few months with the ProtectaClear and I have not been cautious on protecting it from objects or grabbing items because I want to truly see how well it protects the ring. I also wear the O. Sleeve (expensive but necessary) and Ring Wrapper (I wear both) when I workout/lift because I know the bars will 100% scratch it. Outside of lifting I do not wear the protection sleeves. Also to note the O. Sleeve and Ring Wrapper work amazingly during workouts and the Oura Ring doesn't get damaged. I have put 255lbs benching, 50+Lbs dumbbells, 170lbs double D Row Handle Attachment, etc and no issues at all. So I highly recommend this combo! Also, the ProtectaClear doesn't do anything to the color or make it less/more glossy. Which was something I didn't know how the ProtectaClear would or wouldn't do. I don't know how this would protect on the Matte Black/Stealth but I would assume it would turn the Matte look to a glossy look. So I would be cautious to use this on Stealth. The only thing I don't know about with ProtectaClear on the Oura Ring is how often do I need to reapply. I've seen anything from 6 Months to 2 years. I'm leaning more towards 6 Months for reapplication since forums reported that for heavily used metallics using ProtectaClear should reapply every 6 Months to 12 Months. Overall, very happy with ProtectaClear on my Oura Ring and have truly put this ring and ProtectaClear through a lot of wear and tear (banging it against hard items, grabbing keys/metallic items, etc) with literally no scratches. Simple water and wipe down will shine it back to normal to get smudges off the ring. Hopefully this helped because there isn't a lot of information out there to help Oura Ring owners to protect their ring.
C**N
Great product
Very handy. It has a strong smell but as ling as it used outside in an open area, it does its job.
J**S
Great! (but not permanent)
It's fairly easy to apply. Takes some time to dry and cure though. Slightly annoying for my ring that has to dry, flip, and dry again. It also doesn't hold up to constant wearing. I bought a natural beaten copper ring that tarnishes easily and this is great for about two to three weeks of wearing and washing. But it is definitely better than a black ring around my finger and it doesn't diminish the look of the ring at all. It's clear and smooth and does a great job.
F**A
Excellent protection and great finish!
This product works perfectly. It forms a strong protective layer that prevents tarnish and rust without changing the look of the metal. It’s very easy to apply and dries clear. Highly recommended!
A**R
Can rusts in less than a year - UPDATED
UPDATE: I left my original review below though I've updated my overall rating to 5 stars. Everbrite reached out and is sending me a replacement product. Awesome product (which I knew) and awesome customer service. ORIGINAL REVIEW: I really like this product so this is a difficult review to write. The product itself is the best on the market to seal and keep the bright finish on many metals. I have used it on brass, copper and bronze for years and it protects the metal and keeps it finished the way you want it. However, it is essential not to brush or dip from the original container to avoid introducing contaminants and other particulates that could make their way to your work piece. I always pour what I intend to use into a smaller container to use it. I generally use a glass or stainless steel container depending on what I intend to dip and never pour anything back to the original container. I've found that for bright finish metals, it works best when the work piece is dipped. Then you can use a cut piece of newspaper to wick away excess as gravity draws it to a hanging drop at the bottom of a work piece. The only other issue I have experienced is iridescence (rainbowing on the surface of brightly finished material). This can often be mitigated with another coat. The reason for this review has nothing to do with the product or how it works. The container failed in my case. In about a year, rust spots developed on the inside of the container. The outside of the can was in perfect shape. The rust on the inside of the can ruined the product by turning it a pale shade of brown with bits of rust particulates. Disappointed for the price that the container failed in about a year and ruined what was left of the product. Especially since I am so careful about using it and sealing it back up to avoid the introduction of contaminants. Next time I may resort to pouring the contents in a glass container with a lid. What is odd is that I've used the larger size 16oz and even 32oz containers over the same period of time in the past, which also come in steel containers, and never had this issue.
A**C
Thin, easy to work with, would recommend for red metals, with a caveat
Original review, see edit below: I tried this for the first time for coating copper and bronze rings, and I think I like it. Very thin, you don't need much for small pieces, so 4oz will go quite a ways. It self-anneals, so if you have minor abrasions during the coating process, another coat will make that go away. Cleanup is with Xylene, though I found Acetone also works great as well - I was happy to find that with a cloth and a little jar of acetone, I could completely remove a partially cured coating without any residue. This 4oz can to be much better than spray polyurethane, which was difficult to get right on metal and needed sanding between coats, whereas this did not. I like how thin it is. Make sure you read the instructions and follow all of them. Wash the item with soap and water, use the neutralizing solution to remove any acids from polishing compounds, use alcohol as a final step to clean the surface. With rings, I made some hooks from some sprue wax I had laying around, and dipped half the ring in the coating, removed excess with a small painter's brush, and let it dry for two hours, then dipped the other half. There was no seam or any sign at all that there had been a delay between coatings. I gave each ring two full coats (that is, four half coats), and let them hang for a week to harden, as recommended. They all look pretty great - you cannot tell there's a clear coat over the metal, and I don't have to worry about the copper tarnishing or turning people's fingers green. Aside from the long curing time - though it is dry in a couple hours, a full cure takes five days - it's pretty good stuff. I'd recommend it for anyone who is making jewelry out of red metals if you want to preserve the patina or surface for as long as possible EDIT: An update. So, after about six months of wear, this is the result. I made six rings, and coated all of them with ProtectaClear. Two of these rings were either all metal or a hard patina, and four had a cyanoacrylate-type gemstone inlay as well. Of these rings, five of them, which are worn about once per week, are holding up quite well. The sixth, however - an inlay type which is worn every day - has begun to peel. It started after about three months, so I had the recipient send it back to me so I could strip off the coating, re-polish the ring, re-neutralize it, and try again. I did so, but within two months it has started to peel again, coming away in little flakes. Needless to say, this is very disappointing. I followed the instructions religiously, careful with the neutralization process, careful with the cleaning, gave the ring two complete coats and a full two weeks at room temperature to cure after coating, but the effect was the same both times. The flaking is occurring on the metal and the inlay, but does not - from appearances - appear to be occurring on the inside of the ring, so at least there are no green fingers. As a result, I cannot necessarily recommend this for rings which will be worn all of the time. I an currently seeking alternative coatings, and will leave an update if I find one that works well. EDIT 2: See my response in the comment below this for further details on an alternate coating EDIT 3: As Amazon is removing the review reply function, here is a copy of my findings: I did eventually find a solution, which I just tried late last autumn and still appears to be holding up. I purchased Finish 1 2K Urethane Automotive Clear Coat: 32 oz. Quart Clear Coat + 8 oz. Activator , and thinned it with Rust-Oleum Automotive 253307 32-Ounce Lacquer Thinner, with a ratio of about 2:1 clear coat to thinner. You are really going to have to experiment with the ratio to find one that works for you, but broadly speaking, the thinner you can make it work, the better. Eight thin coats is much better than two thick ones. It took a considerable amount of testing, but I ended up getting something that looked pretty good in the end. Basically I bought a bunch of those little clear plastic cups and some craft syringes. I cut the top off of the plastic cup, just because it made it easier to work with and I used less clearcoat as a result. I measured the mix with the syringes, mixed the clearcoat, added the thinner and stirred it well. I polished the rings to a brilliant shine and cleaned them with alcohol. Then I used the sprue wax hooks to dip them into the clearcoat, one half at a time , and a small painter's brush to rid the excess. I gave it about an hour drying time between each dip (so dip one half, wait an hour, dip the other half, repeat). Each ring had at least two full coats (four dips), and most had four. I had the best results using a completely new batch of clearcoat for each dip This does mean that for every dip, you lose the majority of the clear coat, but since I was using about 8ml (clearcoat+hardener+thinner) each time, when I look in the can I can barely tell I used any at all. I gave an hour of drying time per dip (I was using the hardener with the medium drying time), but I followed the instructions pretty exactly beyond that. The coating can be handled within 48 hours, but I recommend at minimum a two week drying time to really harden it up, and if your logistics allow for it, a month. If you have a UV lamp that might improve your drying time by a good margin, but I can speak from experience on that one. Caveat here would be that this coating is much thicker than the Protectaclear, even when thinned. If you custom size your rings, then you might want to increase it by a hair - and I mean a hair, no more than a hundredth of an inch diameter. The Finish1 guys say it can be sanded and polished but I didn't risk it myself, you'd have to wait a month before you tried anyway. If you mess up a coating and it isn't fully set yet, use the thinner, completely clean the ring, repolish it and try again. If you are getting bubbles, then trying going a little thinner with the mix. Definitely get the bubbles out when it is wet, because when it is dry they are there to stay. I found a good, hot breath will help disperse most little bubbles, but you can also try an indirectly and very (very) carefully applied torch lighter if you are feeling adventurous. If you only notice a mistake after it has set, you might be able to soak it in thinner but you are probably stuck sanding it down and trying again. It took me 2-3 tries to get something presentable, but I had good results after I figured out the details.
S**O
keeps my wrists from turning green or black
I have recently started working with metal in my jewelry-making. I decided to choose one metal and stick with it, to really learn that metal well. I went with copper both because I love the warm, red tones of the metal and because it is less expensive than silver or gold. I am using a variety of forms of copper right now -- metal stamping blanks, wire, and even some copper tubing that I have flattened with a hammer. One thing that is common to all these forms of copper is that it can turn green (especially if it gets wet or sweaty) and can discolor the skin. Who wouldn't want to avoid that? (For what it's worth, I really like the look of bright copper a lot. Antique copper has its charm, but the bright color of unoxidized metal is my favorite. So protection from oxidation is quite important to me.) Anyway, I saw this product recommended elsewhere so I decided to give it a try. I bought the 1 ounce package. I figured I would see how I liked it and then I could always go up a size in the container next time, if I liked it. Well, I do like it. It takes a little practice to get your technique down for using this. I'd suggest trying it out on stamping blanks or scraps or something easy and inexpensive and disposable first if you are new to this product. Instructions are supplied with the package and it is definitely to your benefit to read and understand them as well as to follow them. Make sure your metal is very clean and if you are thinking of using acetone to clean it, I'd steer you towards the kind you can find at the hardware store in a metal can because many nail polish removers have added conditioners, proteins, and oils, which is great for your nails but not for cleaning metal. I don't like to dip my pieces in this for two reasons: (1) I feel this is an inefficient use of the product and (2) my pieces often have beads (glass, semiprecious stones, etc.) and I don't want to coat the beads and then have to clean them off. What I do instead is use an inexpensive paintbrush I bought here on Amazon as part of a set. (If you are making simple rings, dipping will work. But I make complicated bracelets and such with lots of dangles.) I do very thin layers of coating (I am good at this thanks to painting my fingernails quite often...it's a similar technique!). Out of an abundance of caution (and usually because I get busy doing other things), I wait about a day between coats. I still take care not to get my jewelry wet or sweaty, but so far everything is looking wonderful and my wrists aren't green or black. Every so often, I will probably add another coat to be on the safe side.
A**A
Very weak coat
Very weak coat. I got it to coat bijouterie since it oxidises very quickly on my skin causing allergy. Few pieces covered in at least 2 layers oxidised by the end of the day. I don’t know how many coats I would need to do to avoid this but I don’t have that much time. Also, it’s not very clear immediately that the solution will drip and leave a lot of drops on the piece unless you remove it constantly until drying. Another solution that dripped on the surface is impossible to remove, this one can be just scratched with the nail. Do not recommend.
A**Z
Protecta Clear protege tus joyas de metal
Magnífico
V**G
Ease of use
Easy to use as the liquid is self leveling.
C**S
Aspect bijou en or.
J'ai bien suivi les instructions. J'ai passé une première couche du liquide à l'aide d'un petit pinceau sur des boucles d'oreilles dorées et sur une grosse bague toute dorée aussi. Après la 1re couche, déception ! Le doré avait viré en un orange léger, suffisamment pour faire pacotille. J'ai passé la 2e couche, en mettant peu de produit aussi et toujours en laissant sécher toute une nuit. ET LÀ, MIRACLE ! La teinte est un très beau doré particulièrement brillant. Franchement, que ce soit les boucles d'oreilles ou la bague, on dirait de l'or. Évidemment je recommande vivement ce produit qui certes est cher, mais il en faut tellement peu que cela vaut l'investissement.
H**R
it does it's job
It does it's job well. I use it to coat my belt buckle to guard from metal allergies. You need to reapply after a few months.
Trustpilot
1 week ago
1 week ago