🚀 Upgrade your 3D printing game with speed and precision!
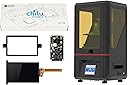
This 6.08-inch Mono LCD screen kit with Chitu V2 motherboard offers a 2K 1620x2560 resolution for Anycubic Photon printers. It delivers twice the printing speed and 10 times the lifespan of original screens, ensuring faster, sharper, and more durable 3D prints. Easy to install in minutes, it’s the ultimate upgrade for professionals seeking efficiency and reliability.


| Asin | B09WY34K1Z |
| Batteries Required | No |
| Best Sellers Rank | 142,295 in Business, Industry & Science (See Top 100 in Business, Industry & Science) 1,273 in Motherboards 3,815 in 3D Printer Accessories |
| Customer Reviews | 3.9 3.9 out of 5 stars (27) 3.9 out of 5 stars |
| Date First Available | 31 Mar. 2022 |
| Guaranteed Software Updates Until | unknown |
| Item Package Quantity | 1 |
| Manufacturer | chitu systems |
| Manufacturer Reference | 95 |
| Part Number | 95 |
| Size | screen with motherboard |
User
Don't bother.
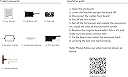
Don't bother. Instruction are complete BS and a nightmare to fit.I have no idea if it actually is better as the printer no longer works due to the totally incompetent instructions.Buy a cheap 2k printer instead. I HAD to after trying to fit this.
User
Seems used
Works ok, but it's definitely not new.....either used or refurbished
User
Plug and Play
Leicht einzubauen und Funktioniert ohne Probleme. Plug and Play
User
impressionante, dalla notte al giorno!
Sto componendo un video tutorial completo su youtube per illustrare il montaggio (canale Preternatural Channel)Il montaggio non è facilissimo e purtroppo neanche ottimale, ma con una piccola modificaall'installazione originale suggerita si riesce a ottenere un posizionamento funzionale.Una volta installato correttamente la stampante cambia radicalmente, c'è poco da fare: i tempi di stampa si dimezzano (anche meno della metà), la qualità di stampa è nettamente (e soprattutto apprezzabilmente, visibilmente) superiore e perfino le dimensioni di stampa aumentano un po'.Chitu afferma che il pannello oltretutto abbia una durata almeno dieci volte superiore all'originale (chi ha l'originale saprà che purtroppo quel pannellino non dura una vita... io l'ho dovuto cambiare perchè il mio non rendeva assolutamente più bene, creando un'immagine ormai del tutto inaccettabile con qualità di stampa pessima).Niente a che vedere col pannello originale a colori, poco contrastato e di rapida obsolescenza: questo kit cambia proprio tutto e trasforma la piccolina "obsoleta" Photon in una Photon monocromatica enormemente migliorata: un piccolo mostro!
User
WOW, Chitu. Wow. You outdone yourself.
If you have a Photon OG; Anycubic Photon Classic, THIS. IS. THE. UPGRADE. YOU. NEED!!!You suffering from hours and maybe days from running exposure tests to get it...just right. If you love this printer and plan to keep it for years, don't wait, don't think, this upgrade is what your heart wants. It's what your printer wants. Don't be like me and wait two years sitting the item in your cart. The price ain't going down. And to be blunt, paying high dollar for a product that meets all your needs doesn’t come often. I use to spend hours creating elevated, RERF-like, test and manually changing the exposure time at layer counts to get good results. With this kit, I took a leap of faith at 3s exposure after an easy installation. Shocked. Then 2.5s, another successful print that made me suspicious. Then 2s just wanting to see it fail at this point. It did.FINALLY... at 2.25s....a print so accurate it created a syringe-like vaccum when assembling the parts. I went from 23-25s exposure time to 2.25s... a 90~91% reduction rate. Absolutely insane. I can go on and on in words....take a look at the photos. I keep all my test in cans for records (18s with std resin, 25s with ABS like 2.0 before install). The old ones are a bit dirty. But this will be the answers your looking for. Now here comes the bitter part....the directions...very minimalistic and no clear directions. Had to go to every corner of the web to get a clear idea. At this price, you don't wanna mess up. The MB should be installed with the standoffs attached and the usb point left and away from the UV light shroud. The LCD screen upright position scared me so I ended up skipping the final tapeling phase and used painters tape on the screen protector instead. When you attach the ribbon cable, if you struggle stop and look, align and press. If you have to twist the LCD ribbon cable to connect it, you either have your screen upside down or the MB facing the wrong way. The double sided tape....peel it leaving the backing or else you will stretch it or it will stick to itself. I left mine off because I added tempered glass to my install. After that, you are golden. Enjoy. Happy printing.
User
È più grande
Tutto non conforme
User
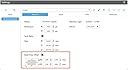
Makes the printer better in every way, but could be just a bit better
This kit comes with some assembly required obviously, but it is not so complicated that you need an electrical engineering degree. If you have ever put together your own computer then this is child's play, albeit a bit tighter space to work in.I love how this kit both changes the screen to monochrome and increases the size of the print area at the same time. I have had good print results from it so far and the extra features are incredible for upgrading the barebones Photon into a decent, more feature rich machine.The options that you have during printing make it so much easier to adjust needed settings between resins, so you don't have to re-slice everything if you just want to change out which resin you're using. The fact that you can change important printer settings mid print from the printer is great, but I really, REALLY wish that I could apply those settings once and not have to toy with it again unless I want to. As the printer functions now, you have to go in and change the settings every time you start a print. My printer has a UV source that is way too powerful for the screen, so I always have to go in at the start of every print and bring the pwm setting to a very low 60%. I really wish I could set that and forget about it.The metal bracket that holds the screen in the right place needs some very careful straighteneing, or it won't sit flush with the screen, which is very annoying for zeroing. I almost with this had just been a plastic part, as I feel it would come in the package more straight than its metal counterpart.One last thing, make sure that you install the screen the right way up. That is a mistake that I made, as the instructions on this part are ABYSMAL, so make sure you have the blue strip side facing up so you don't get weird printing results.
Trustpilot
2 days ago
1 day ago