Desertcart purchases this item on your behalf and handles shipping, customs, and support to Austria.
☀️ Elevate your solar game with precision and style!
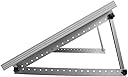
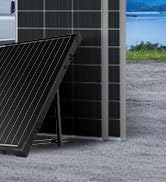
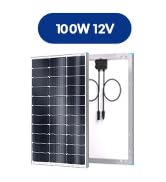
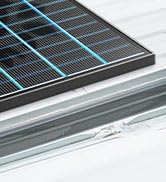
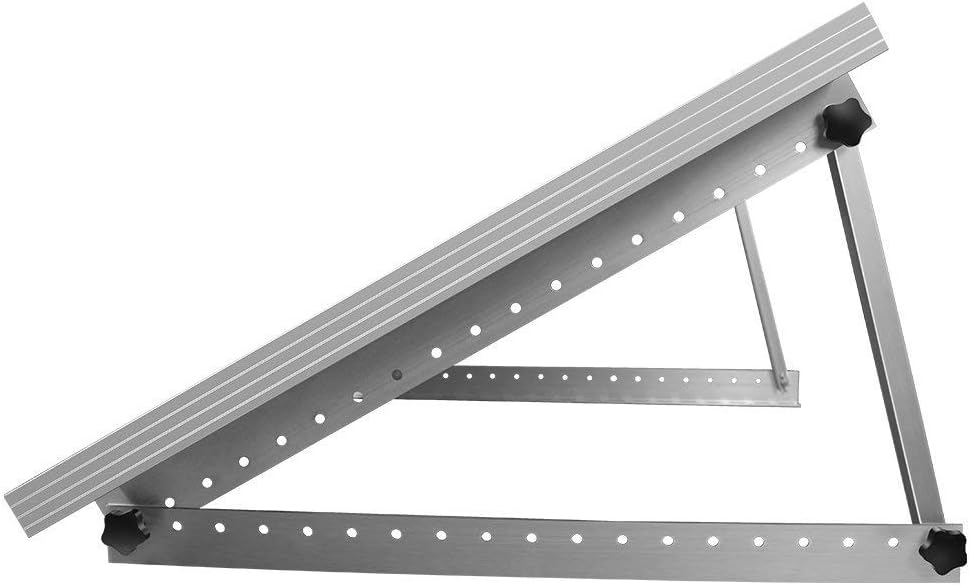
The Renogy 28in Adjustable Solar Panel Mount Brackets feature a robust, rust-resistant aluminum frame with foldable tilt legs for customizable solar panel angles. Engineered for quick assembly using stainless steel fasteners, these mounts are compatible with Renogy’s 50W, 100W N-Type, and 120W Shadowflux panels. Perfect for RVs, boats, fences, or any flat surface, they offer a versatile, durable solution to maximize your off-grid solar efficiency.


| ASIN | B07CSKFWK7 |
| Best Sellers Rank | #15,545 in Patio, Lawn & Garden ( See Top 100 in Patio, Lawn & Garden ) #74 in Solar & Wind Power Parts & Accessories |
| Brand | Renogy |
| Brand Name | Renogy |
| Color | Silver |
| Customer Reviews | 4.5 out of 5 stars 2,069 Reviews |
| Finish Type | Brushed |
| Finish Types | Brushed |
| Global Trade Identification Number | 00816360026716 |
| Included Components | mounting brackets |
| Item Depth | 1.97 inches |
| Item Dimensions | 27.95 x 1.97 x 0.98 inches |
| Item Type Name | on any Flat Surface for RV, Roof, Boat, any Off-Grid Systems |
| Item Weight | 3.5 pounds |
| Item dimensions L x W x H | 27.95 x 1.97 x 0.98 inches |
| Manufacturer | Renogy |
| Manufacturer Part Number | RNG-MTS-TMB |
| Manufacturer Warranty Description | 1-year material warranty |
| Material | Aluminum |
| Material Type | Aluminum |
| Model Number | 28in Adjustable Solar Panel |
| Mounting Type | Flat Surface Mount |
| Set Name | Renogy 28in Adjustable Solar Panel Mount Brackets Set |
| UPC | 816360026716 |
| Unit Count | 2 Count |
R**A
solid build, quality machined aluminum.
This mount is great. I used it to mount one 100w panel vertically to a fence. I love the machined aluminum, quality stuff. Very easy to install and very adjustable. So much easier that trying to build a mount from scratch.
M**K
Sturdy Mounts
Nice sturdy adjustable mounts leaves 4" spacing and easy to adjust.
T**T
Close, but no cigar
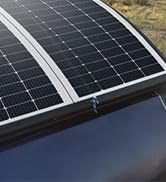
I ordered 4 of these tilt brackets for installation of four 170W Rich Solar panels on my RV. Of the 4 kits, one kit was missing the bag of hardware (nuts, bolts, screws). Amazon fixed it easily, taking the return and shipping a replacement immediately. This kit is for solar panels up to 28" wide, and my 170W panels are about 26.5", so even though the listing says they are for less than 100W panels, I don't see any reason why you can't use these for a 170W panel. First, I should say that these are by far the cheapest option out there - thanks Renogy! Other similar tilt kits run 2x to 3x as much as this Renogy kit, and many are only for smaller panels. But what's the catch? There's no catch. This ki is sturdy, well-made, all aluminum, solid hardware, and plenty big even for larger solar panels. Actually, I priced out a DIY alternative, buying the angle bars and hardware from the home improvement store, and similar M8 knobs on Amazon, but it still cost over $180 for 4 sets! The price of this Renogy kit is simply unbeatable. A DIY kit would be somewhat different. The homestores sell them in 1/16 or 1/8 thickness, but the Renogy kit is 3/32. I found the 1/16 as probably too thin, and the 1/8 was probably thicker than it needed to be. I think Renogy's 3/32 is the right thickness for this application. They have 1.5"x1.5" but no 2"x1" as with this kit. Then, you have to cut and drill everything which would take 1-2 days. While I think this kit is a great deal and well-made, it does have some shortcomings. First, the thread on the knobs is too long, and it takes forever to thread them on. Next, is those damn wingnuts. What were they thinking? The knob and wingnut require two hands to install, along with two types of washers to keep track of. Tilting quickly becomes a real chore. With 4 panels and 24 knobs to take off and put on, tilting your panels can easily take an hour. Ugh! I did some upgrades to work around these issues. First, I ditched the wingnuts, and got a 50-pack of aluminum rivnuts. Then I set them on all prop bars, and on the two ends of the upper bars. Next, I trimmed the threads on each knob with a hacksaw, to about half length so that it goes into the ruvnut but no further. Now, installing knobs is a one-handed quick job. Next problem: the bottom bars are long, and if your roof is curved, they won't sit flat. To get around this, I cut one bar into 6 shorter pieces about 4.5" each, with a mount on each end, and one in the middle. You need a middle mount to position the panel almost vertically in the winter. One other shortcoming of the design, is that there is no easy way to stow the prop bars on the mount. After removing two knobs and laying the panels flat, you can screw the knob and prop-bar into one of the lower holes, but if you have wingnuts, you need to reach behind with one hand to hold the bar and wingnut, which is tricky, because the panel is only 3 inches above the roof surface. Doing this 16 times would be old really fast. So you have to screw 8 knobs into 8 bars, bundle them up, and carry them down the ladder, and store them inside. Dangerous and inconvenient. A better design would allow you to easily stow the panel, and turn a screw to stow the extra hardware until you need to raise them again. To get around this, one customization would be to stow the prop-bar attached to the middle bracket, but that wouldn't work, because the upper bar runs the full width of the panel so you can't put it down flat if there is any hardware attached to any of the holes. This is another bad design choice. To get around this, you can cut a notch in the upper bar in the middle, sacrificing one upper hole, but also weakening it. Not ideal, but it would help to streamline the process. And with 4 panels, 8 props and 24 knobs, 24 wingnuts plus 48 washers to deal with, tilting the panels is anything but easy. You'll quickly learn to hate it, never tilt them up, an regret the time trouble and money you spent to get this tilting capability. This mount kit is not do much 'designed' as it is assembled from stock parts. This is the crux of its weakness. And if Renogy went with rivnuts instead of wingnuts, that would require them to manufacture it, rather than assembling it from off the shelf parts. Price might go up a bit, but usability would skyrocket. Let's say it is a good starting-point: a kit that cost less than the raw materials, with a few good features, but ultimately requires a good bit of customization to turn this kit into something you can easily live with.
D**N
Adjustable solar panes brackets
We have four of these brackets for our Renogy rigid solar panels (100 Easy to install on rigid panels (need correct tools). Comes with disconnect knobs
B**.
Sturdy, Simple, and Perfect for My RV Solar Setup
The brackets are lightweight but feel solid, and the stainless steel hardware gives me confidence they’ll hold up over time. The adjustable tilt feature is a big plus—it lets me adjust the angle easily to get better sun exposure depending on where I’m parked. Everything lined up well during installation, and the included hardware was complete (which isn’t always the case with kits like this). Pros: Easy to install with clear hole placement Adjustable tilt works great for maximizing solar input Lightweight but durable aluminum construction Folds down flat when not in use Cons: None so far.
T**N
Minor mods for use as portable stands for RV
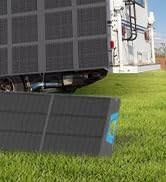
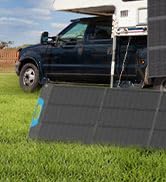
I purchased a pair of Renogy 100watt panels for use with my travel trailer. Though my kit came with roof brackets I knew I wasn't going to mount them there. On the east coast our campsites are cut out of the forest so there's not an option on which way you park, the chances of getting a southern exposure is pretty slim. I also wasn't keen on putting more holes in the roof or climbing up there to position the panels. A mobile mount and 20' of cabling means I have a much higher chance of getting them in the sun, our favorite sites are well shaded. As I was looking around for ground based mounts I found a lot of people hinging two panels together and using them in a vertical orientation. Finding a flat spot can be a challenge, and why would you make them top heavy by setting them up vertically? This is especially true if you're using a "kickstand" DIY bracket. By using them horizontally they have a lower profile as far as wind and other mayhem is concerned, and keeping them as two separate units means you could put them on uneven ground at a few feet apart if needed. I have a metal distributor around the corner from my office, I priced what they sold and determined it would cost me more to make mounts than it would to buy the Renogy units. I was considering fabricating some folding/self storing legs but these would have left me with a smaller range of adjustment. What's pictured above are what I did to help streamline setting them up and taking them down. First, since these will always be used horizontally, I cut off the excess material so that the piece that mounts to the panels is the same width as the panel. Next, I installed nutserts in the panel frames which accept 6mmx16mm knurled thumbscrews with a 22mm head (found here on Amazon). So setup is just a matter of taking the assembled frames and installing 4 thumbscrews per panel, no tools required. I did enlarge the holes in the brackets that screw to the frame to keep the knurled portion of the thumbscrew from hitting when tightening. I thought about shortening the legs that will be on the ground, but depending on where I set up I may need the range of adjustment so I left them long. At my latitude my tilt can range from 60 degrees to 12 degrees which is quite a range. I use a free level app on my phone to adjust when I set them out, if you search there are sites that can determine the best angle for your location by month.
O**7
Missing parts
Missing all six nuts, otherwise arrived OK. Was able to assemble with nuts I had on hand.

B**O
Extremely versatile tilt mounting kit
These mounts are extremely versatile. I searched for a rigging for a 100w solar panel, with an option to go to a 200w panel, that I could provide a seasonal tilt and came across this product. It is sturdy, well built and a complete kit with all hardware included. I have an aluminum flat roof on my patio, similar to an RV roof and chose to mount the rigging using VHB tape and lap sealant. The installation was a breeze and The angle aluminum looks to last many years to come. For what you get in the kit, the price is excellent compared to the alternatives.
べ**ー
他社のパネルでも使える
しっかりしていて扱いやすい。
S**.
Parfait !
Le support est très bien conçu, et s'adapte bien au panneau solaire, facile a monté, se rétracte après usage...pour prendre moins de place...Nous sommes satisfait.
G**J
Product
Good quality and value for money
B**T
Great for added solar feed in.
Have this on my cars canopy. carries a 170 watt panel that gives me far more solar hours with the adjustable mount angle.
A**S
Bueno.
Para lo que fueron construidos, muy bien.
Trustpilot
1 month ago
1 week ago